The $86 trail camera that I purchased four years ago has been the best hobby investment I’ve ever made. It has weathered temperatures below -20°F, blazing sun and New England rain. Yet it continues to work as well as it did on Day One. It has even survived a woodpecker checking it for food. Eight AA batteries can keep it running for 4-6 weeks easily. With an additional investment of $20 for a solar panel to keep it powered, this thing is nearly indestructible.
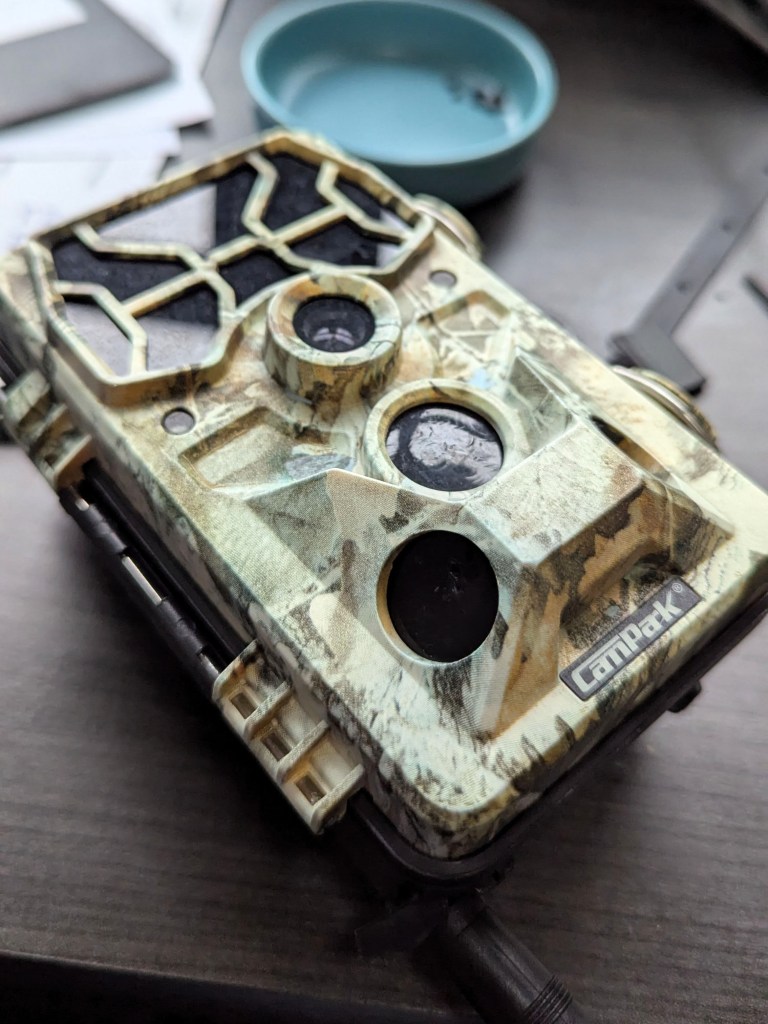
My trusty trail camera. On the bottom left, there’s the window that a woodpecker once tried to peck through.
This particular model – a Campark T80 – is fairly outdated. The company now offers a variety of newer models, some with built-in solar panels.
There’s also a wide variety of similar cameras from other suppliers on websites like Amazon.
The built-in Passive Infrared (PIR) sensors are perfect for detecting wildlife moving in and out of the frame. The 850nm LEDs provide crisp night-time images. While night vision is not required for birdwatching, it’s the only way I would have discovered that a raccoon was eating the grape jelly I put out for the orioles. Or known about that one time a barn owl stopped by to take a look around.


My only complaint is the image transfer process. To access the images I need an Android app that will not let me select and transfer all the images in one go. I could go outside and recover the SD card, but where’s the fun in that? I should also mention that there are now several commercially available options that are reasonably priced. These have food trays close to the camera to get up-close images of the birds, and built in AI models that identify the birds and send you a notification. While accessing images and videos might be easier with these devices, I don’t think they provide the freedom of customization that I get from keeping the data local.
Image quality
By default, the trail camera is set to focus on objects more than 20 ft away. After all, the device is intended to capture images of large animals like deer. To use the camera for early detection of migrating hummingbirds, I needed to find a way to focus on small objects close to the camera.
This proved to be a relatively simple exercise. Taking the camera apart, I found the fixed-focus lens that sets the focusing distance. Using a bit of force and carefully prying away the glue that holds it in place, this lens became adjustable. I found that setting the focal plane two to three feet away from the camera was the sweet spot. Any closer, and the PIR sensors went off every time the wind moved the bird feeder.
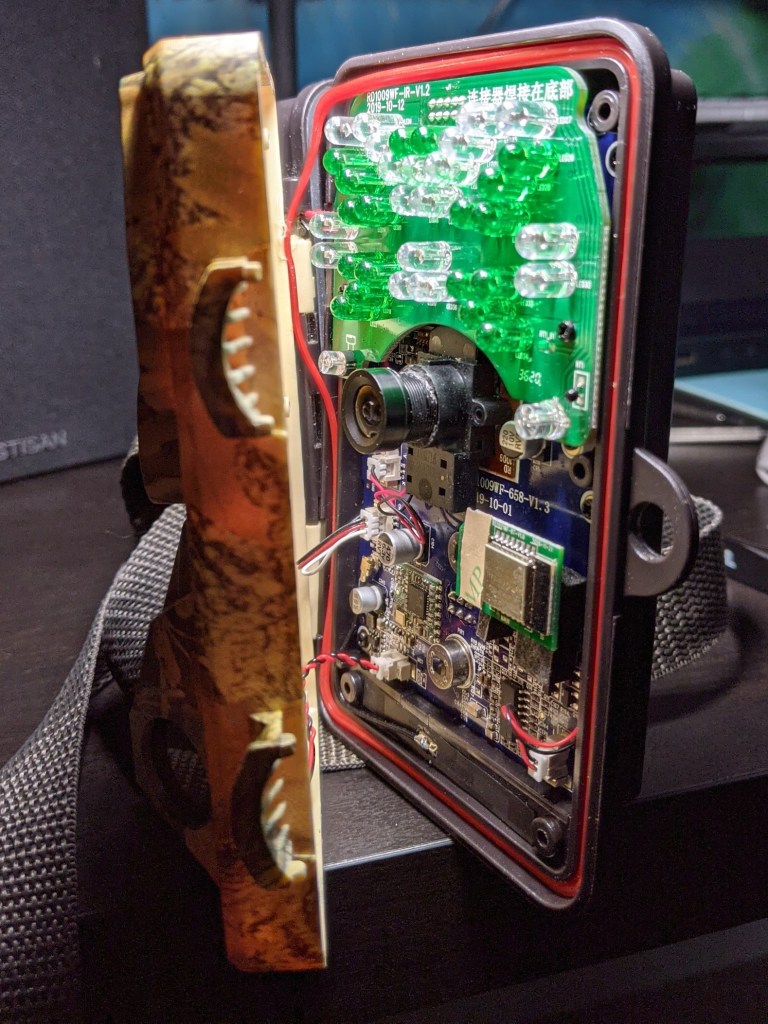
All I needed to open the camera was a Phillips screwdriver.
When I repeated this exercise recently, I accidentally pinched one of the power cables in the hinge. With a quick bit of soldering and a small slit cut into the waterproofing O-ring, the camera is almost as good as new again.
The dirt and grime on the windows might be the next repair on the list.
By adjusting the focus, the tiny birds now take up a larger fraction of the image – dramatically increasing the number of pixels per bird. Image quality is now limited by the resolution of the sensor. When I bought my camera, the standard was 2MP. Newer trail cams have smaller pixels. Although trail cameras are often advertised as having 10MP or higher resolution, it is sometimes obtained through interpolation rather than true sensor resolution. In my opinion, you’re better off saving memory space to store more images. Finding information about the actual number and size of the pixels on the sensor can require a little sleuthing.
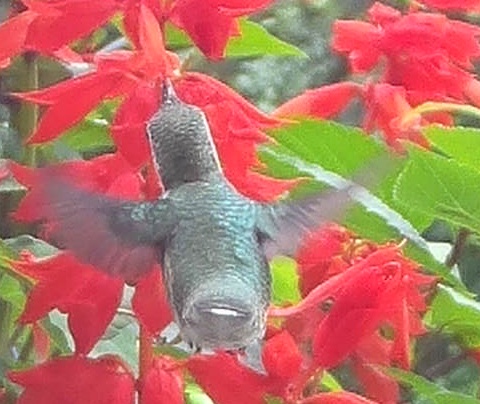
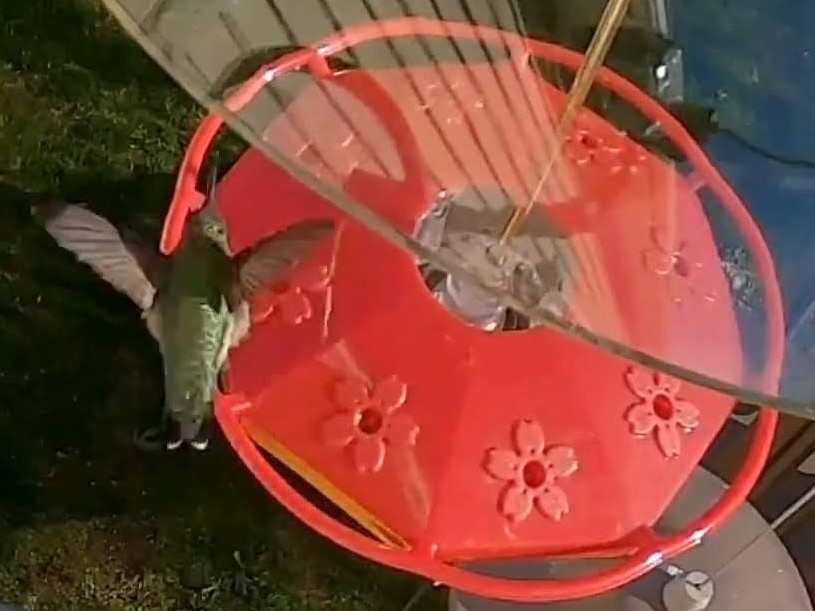
The other thing to consider is the exposure time or shutter speed. Since these cameras are intended to take images in low-light conditions, the minimum exposure time is about 100 milliseconds. This is not even close to what is needed to capture a clear image of hummingbird wings which flap at 80-200 times per second. Below is a comparison of the typical bird wing photos I could get with a trail camera vs. an action camera like the GoPro. For the GoPro – I extracted a frame from a slow-motion video.
Previous post: Bird image sorting – how it started
Next post: Attracting good models – wildlife edition

Leave a comment